
Fiberglass Fabrics for Structural Applications
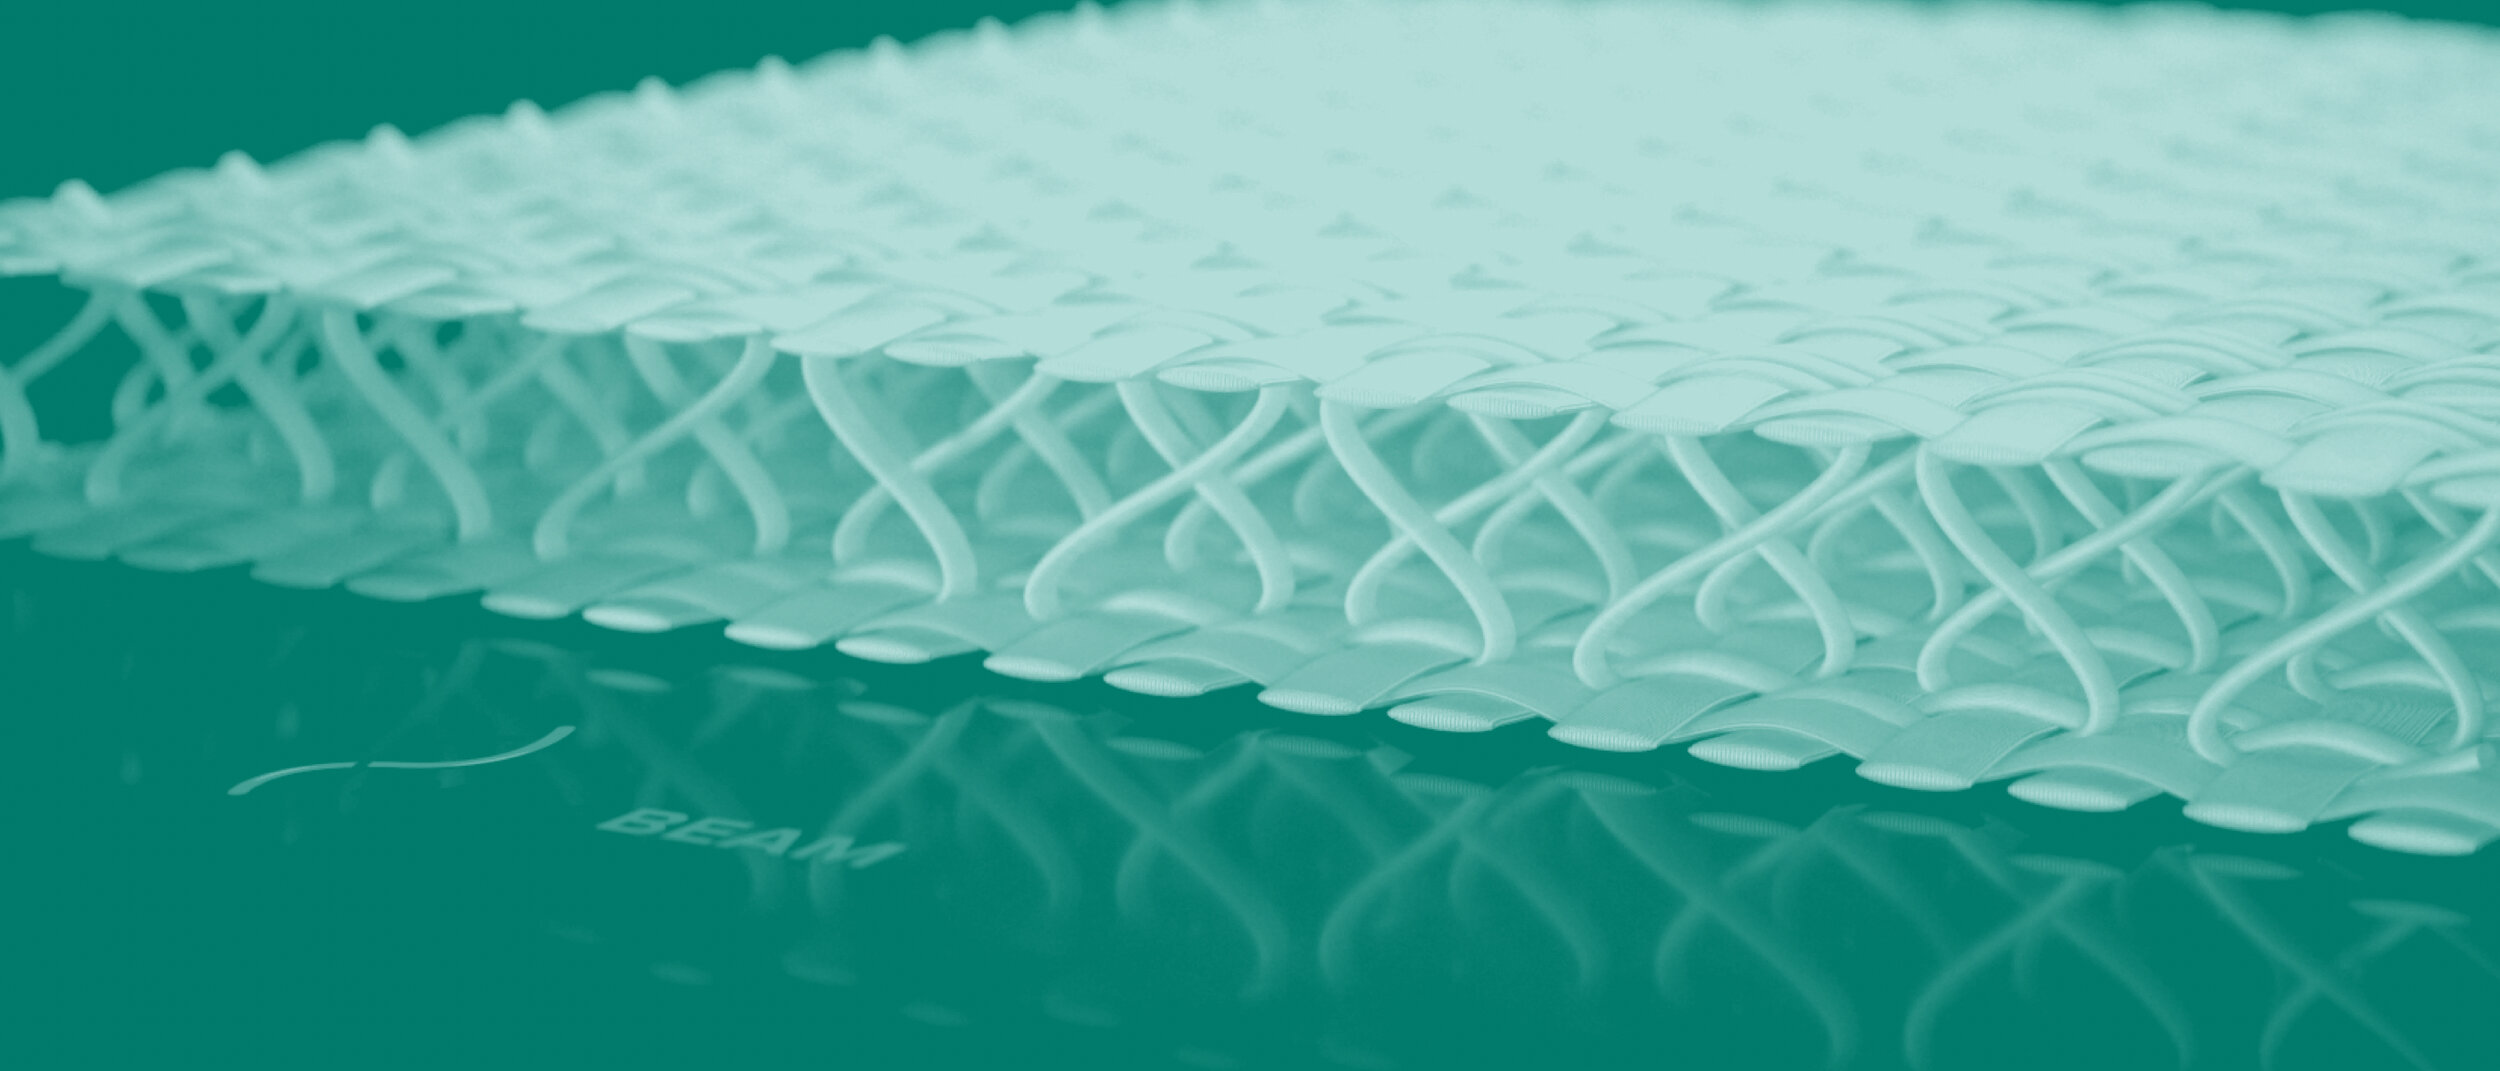
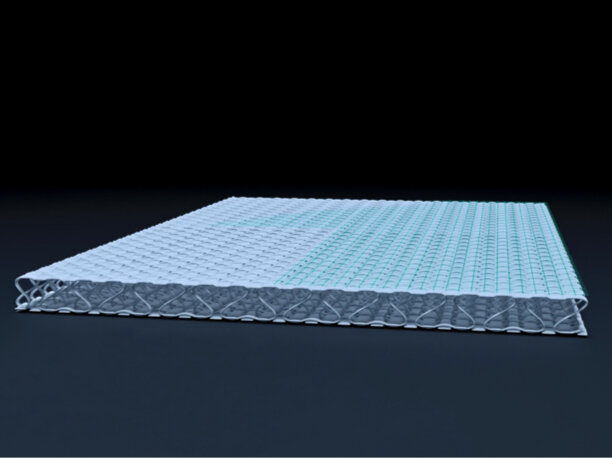
Parabeam 3D glass fabrics are woven out of E‑glass yarn for easy, quick production of high-quality sandwich constructions. Two bi-directionally woven deck layers are bonded together by vertically braided 8‑shaped pillars. The pillars act like springs and push the deck layers apart to a predefined height.
This strong and lightweight sandwich structure has may advantages over traditional sandwich fabrics, as well as wood and laminate products.

100% E‑glass yarn
Application-specific resin

ParaGlass and ParaTank create strong, lightweight structures without labour-intensive production.
Drapeable when needed. Rigid when required.

ParaGlass
Once resin is applied to the ParaGlass fabric, the pillars’ capillary function creates a permanent hollow space. When applied, resin saturates the glass yarn without filling the empty space between the deck layers. Since only a minimal amount of resin is needed, resin waste through oversaturation is a thing of the past.

ParaTank
The ParaTank fabric was developed for use in single-wall and double-wall tanks. The hollow created between the deck layers strengthens the tank structure and creates an interstitial space for leak detection. For 30+ years, tank and tank-lining manufacturers have incorporated ParaTank into their products.
Flexible
Strong
Fire-resistant
Lightweight
Corrosion-resistant

Application Options
The four methods of creating the finished product are: hand lay-up, vacuum infusion, closed mould and inline product. View the video to see the process in action.
Hand Lay-Up Process
STEP 1 | MEASURE FABRIC
Measure the surface of the fabric and calculate fabric weight to determine the amount of resin needed.

STEP 2 | CUT FABRIC
Cut the fabric to the needed size with a tool such as a rotary cutter or scissors.

STEP 3 | APPLY RESIN
Apply 40% of the calculated resin to the mould and spread it evenly.

STEP 4 | ROLL FABRIC
Roll the fabric to ensure that the resin is distributed evenly.

STEP 5 | APPLY REMAINING RESIN
Apply the remaining resin and spread it evenly. It will automatically start absorbing into the fabric.

STEP 6 | ROLL FABRIC
Lightly roll the fabric against the pile direction to ensure an optimal rise.